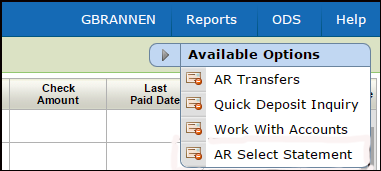
AR Available Options
These options are accessed via the drop down menu in the upper right hand corner of the AR window.
AR Transfers
Use this option to transfer cash or sales between accounts.
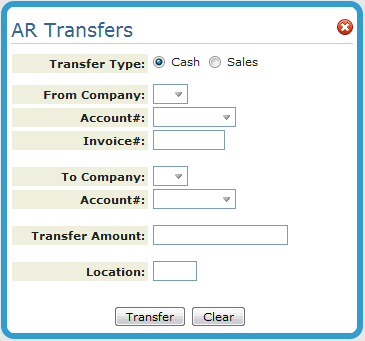
The transfer sales functionality allows you to transfer invoices between different accounts. It is important to note that only AR is affected. The invoice itself is not updated to reflect the new company or account.
All transfers create two transactions:
- A positive transfer— to transaction
- A negative transfer—from transaction
For credit invoices the transactions shown above are reversed.
The sum, or net result, of these transactions is always zero. No separate edits or updating is required. The system examines entries and verifies them on screen. If acceptable, the transactions are immediately posted and inquiries and reports reflect the transfer.
If all of the entries are acceptable, the system prints a message saying, transfer successful, and lists the names of the to and from accounts.
Reports
Both transfer functions, cash and sales, produce a report.
- The Transfer Cash program creates a report (TRFRCASH) showing details of each transfer entered.
- The Transfer Sales program creates a report (TRFRSALE) showing details of each transfer entered.
These transactions are also shown on the end-of-month reports. However, the daily report shows an in-depth before and after record.
Quick Deposit Inquiry
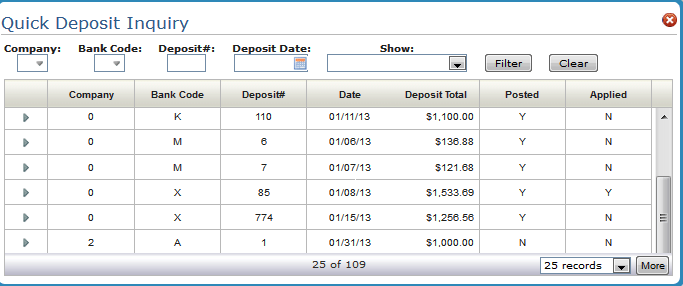
This Available Option allows you to search for and edit quick deposits.
Use the filters at the top of the window to only show the quick deposits you want to see.
Work with Accounts
When you apply cash to (reconcile) an account, that account is considered busy. The system places a record into the Accounts In Use file. This prevents other users from reconciling the same account you are working in.
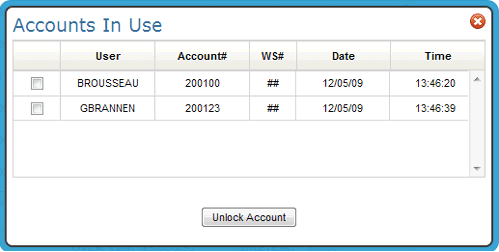
Accounts in Use Guidelines
- When you run cash edits, busy accounts are clearly identified.
- When you post cash, busy accounts are bypassed, and remain in the edit state.
AR Select Statement
This option allows you to generate AR statements. The statements look identical to regular end-of-the-month statements and account for all transactions posted to date.
Input your report parameters.
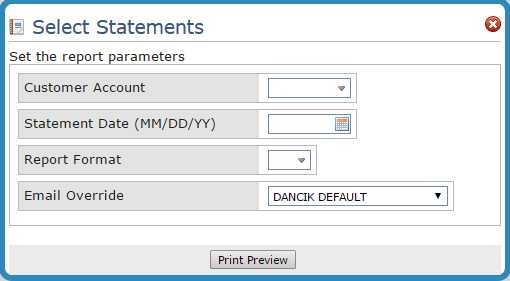
The Email Overlay setting allows you to select an overlay for formatting purposes. The default overlay is identified in the Output Distribution System (ID ARSTATCL on the green screen menu option ODS 10; screen 6).
There are two Report Formats:
- Balance Forward - Balance Forward statements list the account's balance at the end of the last closed month, followed by all transactions (invoices, payments) posted in the curÂrent month. In general, you should use the Balance Forward format for customers who pay by statement.
- Open Invoice - Open Invoice statements list all open items for an account. This format is best for past due accounts. Open invoice statements list all open items for an account. You should use Open Invoice format for Customers who pay by invoice.
Click Print Preview to produce a PDF version of the report.
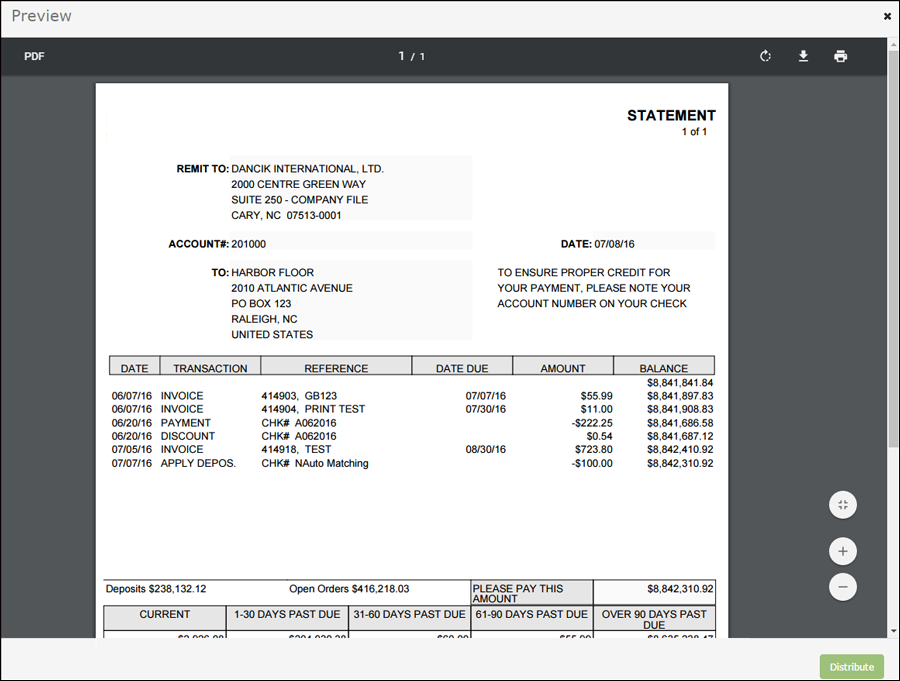
Use the options in the upper right hand corner to rotate, download, and/or print the PDF invoice.
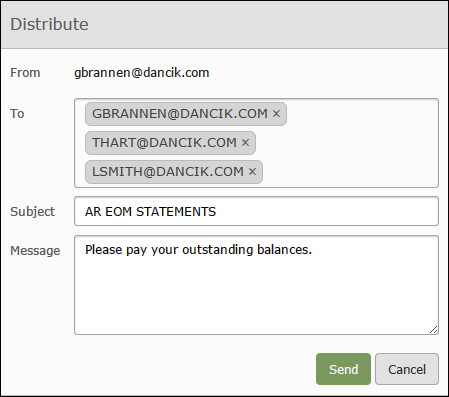
Click Distribute to email the report.
- The From address is the user generating that AR Statement.
- The To email(s) displayed are the ones identified as recipients of Invoices, AR Statements use the same emails as invoices, in the Phone Number File. Follow this path to check if the emails can receive invoices:
- Billto File>Phone Number File>F10 on green screen or Option drop down in Navigator
- Ensure the address is set up to receive Invoices: option S in the green screen> Y entered for IN
